Tv Stand: It’s easier to bring peace to the middle east, then to find a common ground
When we moved to our permanent apartment, we faced our first marital crisis: Home Designing.
My decorative style is totally different from Dima’s: he loves clean, sharp, modern lines, while I prefer messy, unique lines, a lot of retro, rustic and generally old stuff.
It was very hard for us. I did not understand at all why I should have a problem. “The woman is the master of the house” my father keeps saying.
Every piece of furniture I liked, Dima didn’t, and I wondered out loudly “How come he has an opinion?” Of course it has become a joke.
We wondered around every possible furniture store in Phoenix and its suburbs, and found a pattern we both liked: a combination of wood and metal – ironically, everything we found and both liked exceeded our budget.
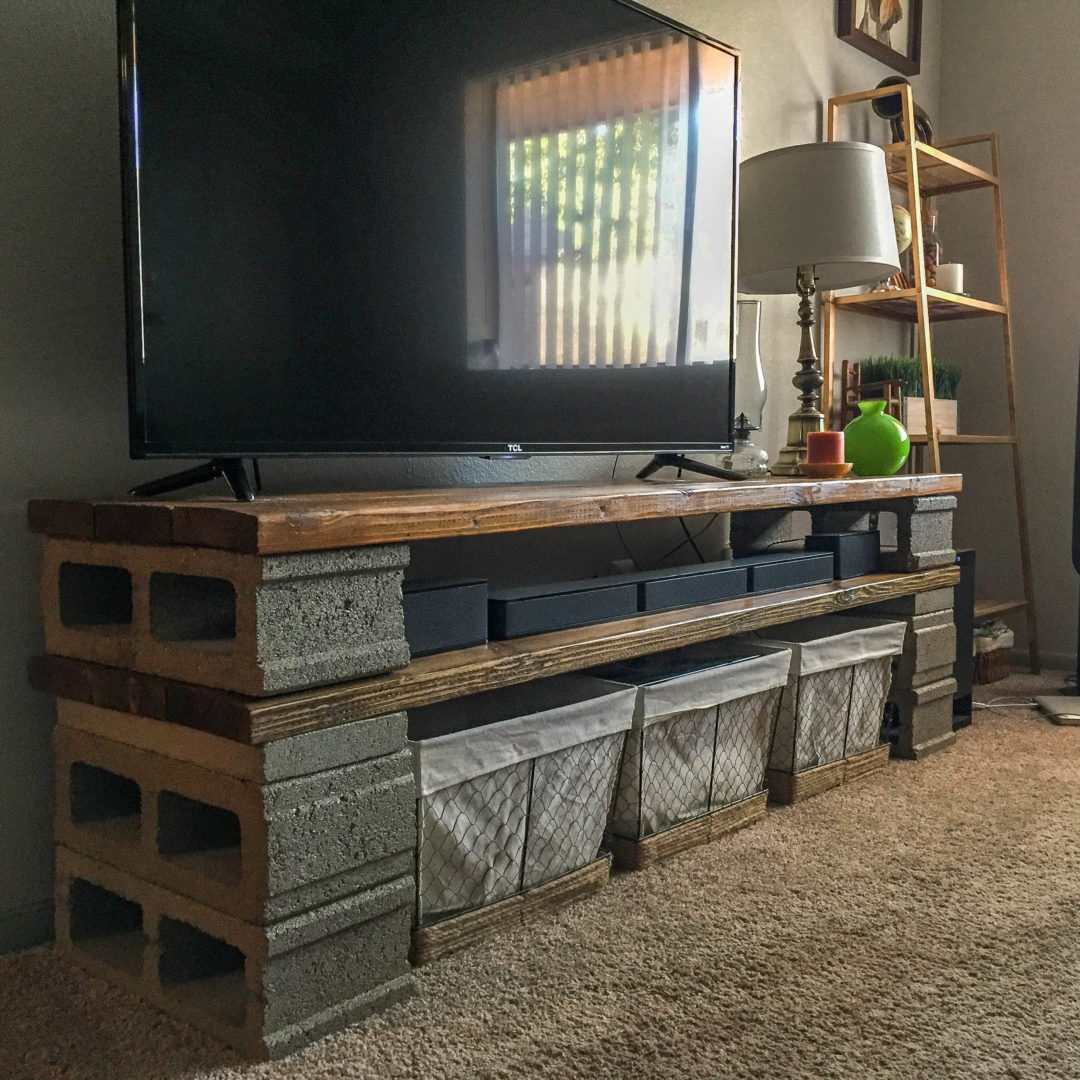
We decided to build our own television stand, something that would suit both of us and be cheaper than the ones in the store.
Dima made a precise drawing of the stand, and we went to the store and bought materials.
Sandpaper: one rough and one delicate
2 Clamps
Wood Glue
2 brushes: one for lacquer and one for paint – take into account that the brush that you will use with the lacquers will probably be destroyed.
6 tie plates
Self Tapping Screws
Screwdriver
Process
1. Sand the wood, Sisyphean job – but in nice weather it can be fun 😊
2. Paint the wood with one layer of paint, you can do as many layers as you want; we only made one layer because we did not want the wood be too dark. If you do more than one layer, you should wait an hour or so between the layers.
3. When the paint dries up, apply 2 layers of lacquer. It is best to wait 4 hours between each layer.
4. After the second layer, it is recommended to let the lacquer dry overnight.
5. The next day glue every three pieces of lumber together and tighten them using clamps.
6. Once the glew is dry (takes few hours), tie the lumber plates with the metal tie plates using the self tapping screws and a screwdriver.
7. Cover the concrete bricks with lacquer, we applyed two layers, to ensure that the brick will not leave crumbles in the house. The brush you will use, most likely will be completely destroyed so there is no reason to invest in a good brush.
8. Place two bricks on each side, with one wooden plate on top of them. Place the last brick pair on the wood and place on top of it the last wood plate (From buttom to up: Brick–>Brick–>Wood Plate–>Brick–>Wood Plate).
Use in health 😊
Looking to reduce design costs? Like the Idea (and hopefully the blog)? you should pin the idea on Pinterest, follow me on Instegram and on Facebook– and let me know what on your mind!


No Comments